Lighting for thermal coats:

how to install lights on thermal coats?

Lighting for thermal coats:
how to install lights on thermal coats?

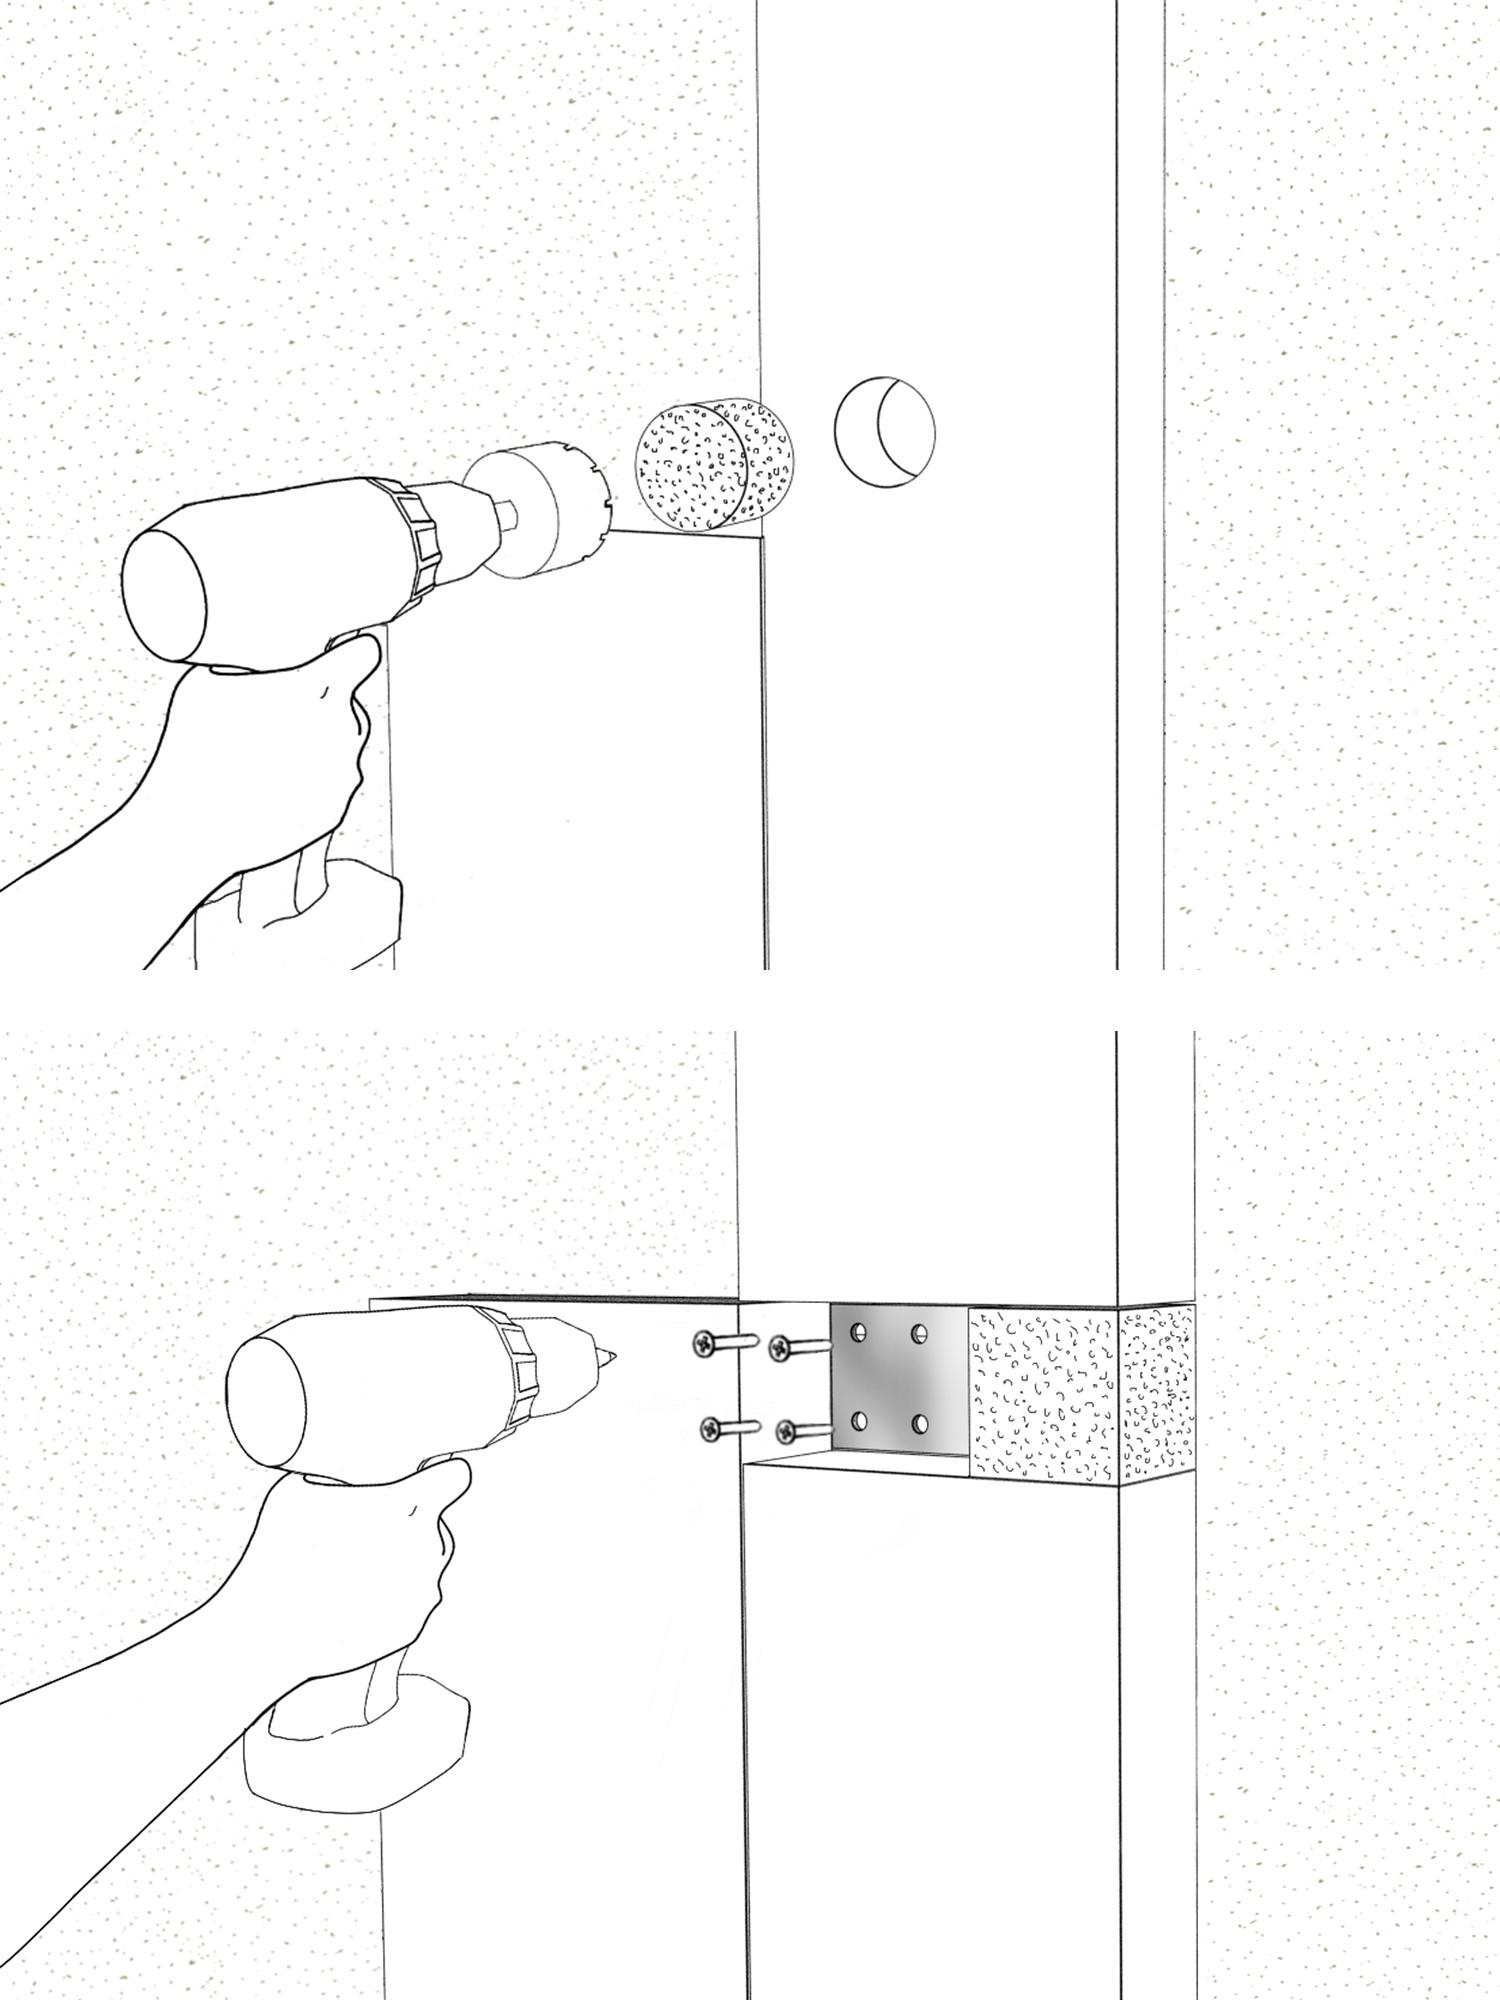
The insulating anchoring systems on thermal coat


Energy efficiency and aesthetics go increasingly together in modern architectural contexts and turn out to be a fundamental requirement in design, especially when talking about outdoor projects.

Hence the development of sustainable building and architecture interventions that can combine design and technology with the use of materials and construction solutions with low environmental impact.

For this reason, STRAL has focused its attention on finding solutions aimed at a combination of technique, aesthetics, and functionality to ensure a durable project that keeps up with the new home concept.


The house 2.0: lighting and energy efficiency


Speaking of energy efficiency, the last few years have seen a significant increase in thermal insulation on coat for homes.

Green building with its rules also affects the world of lighting. Stainless steel, a natural and sustainable material of which all STRAL products are made, must therefore be able to be integrated into increasingly cutting-edge houses that respect the concepts of sustainability, reduced consumption and energy upgrading.

How to install lights on thermal coats: an insulating applique fixing system for thermal insulation coat


To meet the increasingly common and widespread needs, STRAL has developed a fastening system on walls with coat insulation to enable the installation of its wall luminaires.

These fasteners are made of EPS - expanded sintered polystyrene - with very high density and low thermal conductivity, which ensure the absence of thermal bridges.

Thermal insulation, achieved using insulating materials such as coatings, allows the elimination of heat exchange between indoor and outdoor environments.

Any discontinuity in the thermal envelope can compromise the seal by causing these thermal bridges, which are nothing more than colder points where leakage occurs.

These cold spots could be caused by the incorrect installation of a light fixture outside the thermally insulated structure.

Therefore, it is important to understand how to install lights on thermal coats and provide a proper luminaire anchoring system.


How to install lights on thermal coats: Install exterior lights on a wall with thermal coat


For the installation, it will be sufficient to provide in advance for the placement of the corrugation for electrification and insert the panel in the desired position.

The lighting system must then be planned at the beginning of the project with the electrical arrangement of the lighting spots.

STRAL supports clients in this by providing the lighting design service to which is now combined with the structural aspect.

After planning the arrangement of the light spots, it will be necessary to install in correspondence with the electrical junction, the appropriate anchoring systems.

These systems are fireproof and made of polystyrene. The thicknesses available can vary according to that of the coat and range from 60 to 200 mm, while the tensile strength is 100 kg.

If the lighting system was not planned at the beginning of the project, it is still possible to install the wall lamps afterwards, using this system quickly and easily.

It will be necessary to drill holes in the coat at the point where the power cable will be run out from inside the house, using a drill equipped with a core drill, insert the EPS element covered with the appropriate glue inside the hole, screw it in, and then proceed with the installation.


For more technical details, please contact us


Anchor for thermal coat installation: What anchors are recommended for mounting lamps, spotlights, on thermal insulation coat?


The recommended screws and dowels for overcoat installation are self-tapping wood screws or large-pitch cylindrical thread screws, however, metric-pitch screws or drill screws are not recommended.